
Tying a tie is a useful skill for many occasions. You may need it for school, work, or special events. If you do not know how to tie a tie, do not worry. This guide will help you learn step by step. The instructions are simple and easy to follow.
What You Need
- One tie (any color or pattern you like)
- A mirror to see yourself
- A collar shirt
- Patience and practice
Basic Parts of a Tie
Before we start, let’s know the parts of a tie.
| Part | Description |
|---|---|
| Wide End | This is the big, wide part of the tie. It hangs lower. |
| Narrow End | This is the thin part. It hangs higher and is shorter. |
| Tip | The bottom point of the wide end. |
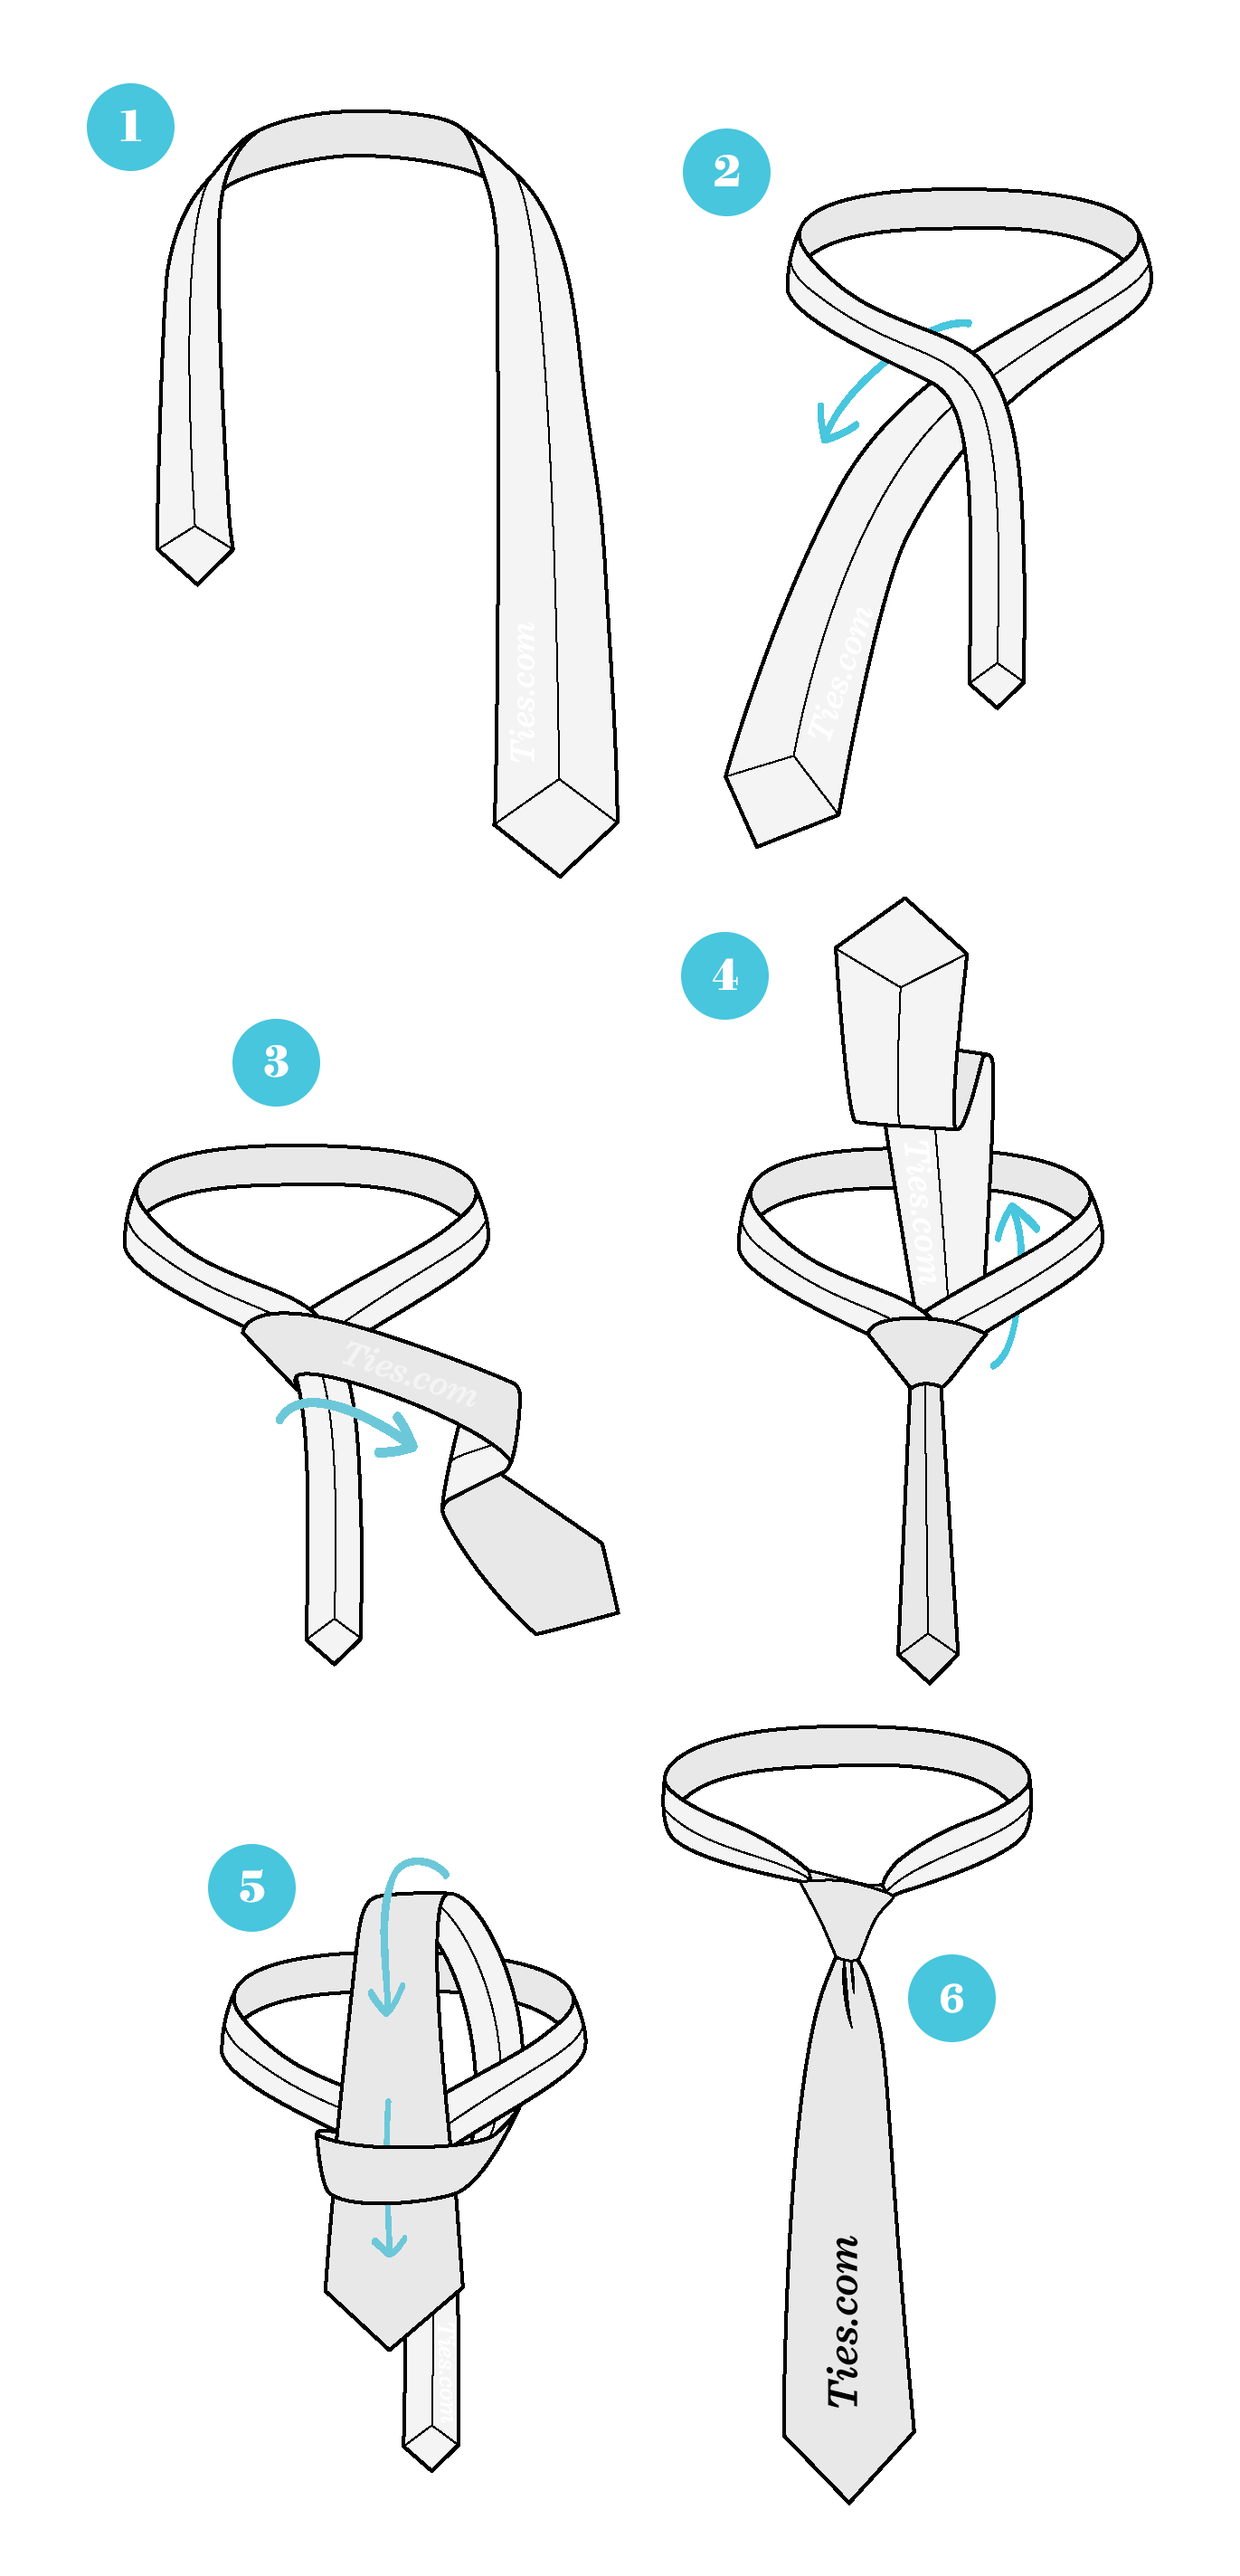
Credit: www.ties.com
How to Tie a Tie: Four Simple Knots
There are many ways to tie a tie. We will learn four easy knots today.
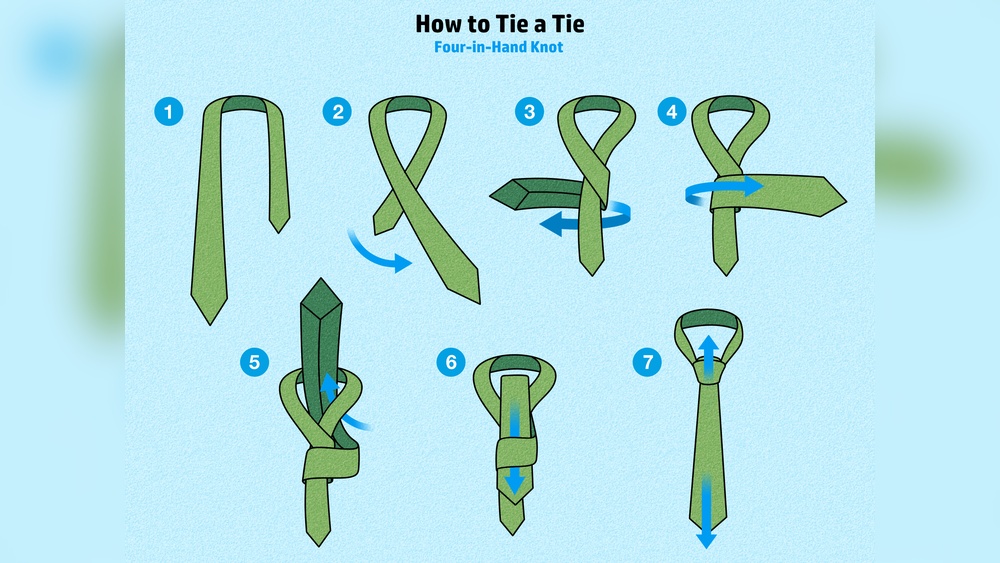
1. The Four-in-hand Knot
This is the easiest and most common knot. It looks neat and works for many occasions.
- Place the tie around your neck. Wide end on your right, narrow end on your left.
- The wide end should be longer than the narrow end.
- Cross the wide end over the narrow end.
- Bring the wide end under the narrow end.
- Cross the wide end over the narrow end again.
- Pull the wide end up through the loop around your neck.
- Hold the knot and pull the wide end down through the front loop.
- Tighten the knot by pulling the wide end down gently.
- Adjust the knot to sit just below your collar.
Done! This knot is narrow and slightly slanted. It is perfect for most shirts.
2. The Half Windsor Knot
This knot is bigger than the Four-in-Hand. It looks more formal.
- Start with the tie around your neck. Wide end on right, narrow on left.
- Make the wide end longer than the narrow end.
- Cross the wide end over the narrow end.
- Bring the wide end up through the loop near your neck.
- Pull it down to the left.
- Bring the wide end around behind the narrow end to the right.
- Bring it up through the loop again.
- Pull the wide end down through the knot in the front.
- Tighten and adjust the knot.
This knot is triangular and neat. It fits well under a collar.
3. The Windsor Knot
The Windsor knot is large and wide. It looks very formal and strong.
- Put the tie around your neck with wide end on right, narrow on left.
- Make the wide end longer.
- Cross the wide end over the narrow end.
- Bring the wide end up through the neck loop and down to the left.
- Bring the wide end behind the narrow end to the right.
- Bring it up through the neck loop and down in front.
- Wrap the wide end across the front from right to left.
- Bring it up through the neck loop again.
- Pull the wide end down through the front knot loop.
- Tighten and center the knot.
This knot is wide and symmetrical. It works well with wide collar shirts.
4. The Pratt Knot
The Pratt knot is medium size and simple. It looks tidy and balanced.
- Start with the tie inside out around your neck. Wide end on right, narrow on left.
- Make the wide end longer.
- Cross the wide end under the narrow end.
- Bring the wide end up through the neck loop.
- Pull the wide end down to the left.
- Bring the wide end across the front from left to right.
- Bring it up through the neck loop again.
- Pull the wide end down through the front knot loop.
- Tighten and adjust the knot.
The Pratt knot is neat and good for many occasions.
Tips to Make Your Tie Look Good
- Make sure the tie tip touches your belt buckle.
- The knot should be tight but not too tight.
- Adjust the collar to cover the top of the tie knot.
- Practice in front of a mirror for better results.
- Use a tie clip if you want to keep the tie in place.
- Choose a tie color that matches your shirt and jacket.
Common Mistakes to Avoid
- Do not make the wide end too short or too long.
- Do not leave the knot loose or messy.
- Do not wear a tie with a very casual shirt.
- Do not forget to tuck the narrow end into the loop at back.
- Do not pull the tie too tight to avoid discomfort.

Credit: www.wikihow.com
How to Untie a Tie
After your event, you need to untie your tie carefully.
- Hold the knot firmly with one hand.
- With the other hand, pull the narrow end down gently.
- Loosen the knot slowly to avoid wrinkles.
- Remove the tie from your neck.
- Hang the tie to keep it smooth and ready for next time.
Practice Makes Perfect
Do not worry if you do not get it right the first time. Keep trying. Use a mirror and go step by step. Soon, tying a tie will become easy and fast. You will feel confident wearing a tie for any occasion.
Remember, a well-tied tie adds style and shows care. It can make a good impression at school, work, or parties. So, take your time and enjoy learning this useful skill.
Summary
Tying a tie is simple with practice. Start with easy knots like Four-in-Hand. Move to other knots when you feel ready. Use these tips to look sharp and neat. Keep your tie clean and well kept. Follow these steps, and you will do great!
Frequently Asked Questions
How Do I Start Tying A Tie Step-by-step?
Begin by placing the tie around your neck with the wide end longer. Cross, loop, and pull through.
What Is The Easiest Knot For Beginners?
The Four-in-Hand knot is simple, quick, and works for most occasions.
How Tight Should A Tie Knot Be?
Tie knots should be snug but not too tight, allowing comfort around your neck.
Can I Tie A Tie Without A Mirror?
Yes, with practice, you can tie a tie by touch and memory.